Monday, February 24, 2014

Orphan blocks unite!

Not long ago I was poking through my box of orphan blocks and pulled together several that were left over from different projects.   Here's what I ended up with:

The center has hourglass blocks in light blue & tan along with yellow & white HSTs.  The outer ring of HSTs are from a different project.  The center square of deep rose pulls the colors together and gives a focus point. I tried out a new free-motion quilting pattern from The Inbox Jaunt and I like how it turned out.  It looks like stippling in the photo, but it's really flowers that look a lot like Chrysanthemums to me.  Lori calls it "Flower Power."  Finished size is just under 20 inches square.

Doesn't it look like springtime? The pastel colors are so refreshing in the midst of this long, cold winter.

The other thing I did this weekend was start a new Blog.   Do you always get stuck trying to come up with dinner menu ideas?  I certainly do.  So, at Weekly Menu from Mom I'm publishing some easy menu ideas and hopefully some people will find it helpful. (Like my adult children.)  I am worried though...The only time my son calls me seems to be when he needs a recipe or cooking directions. I'm afraid when he finally learns to cook that he may never call his mom any more!  (LOL)

Thursday, February 20, 2014

More snow

After two glorious days, sunny and warm (well, above freezing anyway) another winter storm is passing through.  They were predicting at least 6 inches, but I don't think we'll get that much. Unlike most of our snow this winter, it's not fluffy or dry.  It's wet.  Big, fat, sleety, raining off the trees, sloppy wet!  It will break your back snow shoveling, but...

It's perfect for making a snowman.  Hubby came home early and caught me in the act.  But I am unrepentant.  Who says you have to act your age?

It was nice to take a break for some fresh air.  I am getting the chance to Quilt Awhile today too. A couple more Block B's of Celtic Solstice are in the works.  It's coming along.

Friday, February 14, 2014

On Valentine's Day...


It is such a delight to be able to connect with you throughout the year, to receive your kind words of encouragement here on Quilt Awhile, and to be able to visit your blog in return to enjoy seeing your lovely quilting projects.

And so, with inspiration from Kathleen Tracy's small quilts, here are a couple of spool blocks in a little 12-inch quilt to celebrate Valentine's Day and our mutual love of Quilting.

Will you be my Valentine today?

Hugs,
Jean

Thursday, February 13, 2014

An explosion of activity

The scrap basket has become so full that the lid won't close, and the last straw was when the bag of 3-inch scraps basically exploded on me yesterday  morning.  Something had to be done!
Oklahoma Backroads blocks

So, abandoning all other more important projects I quickly searched around for something, ANYTHING, that could be made with 3 inch blocks.  I didn't look too far, Quiltville to the rescue! Oklahoma Backroads by Bonnie Hunter looked perfect.  Bonnie Hunter's scrappy patterns are so much fun, but alas, she works mostly with 2.5 inch blocks.

Not to be discouraged, I decided that the Quilt Police didn't live at my house.  And... I did actually get a Math degree in college (back in the Middle Ages,) so let's use that knowledge for a change.

Only one small adjustment: my blocks need to be  3 x 3 and 3 x 5.5.  Works for me!  So I dumped the bag of 3-inch scraps out on the table.  All the longer pieces were cut into 3 x 5.5's.  The remainders were cut into 3-inch squares.  What was leftover became 2-inch squares for my leader/ender project.  Not much left after that but a few 1.5-inch blocks that went back into the scrap basket.
Split Nine-Patch blocks

So I turned on the Olympic Games and started sewing Oklahoma Backroads.  The 4 bonus HST's that are made from each block can be trimmed to 2-inch blocks and, zip zip, by adding 3 light and 3 dark 2-inch scraps I can make a Split Nine-Patch leader/ender.  Not bad progress.

I'll just make up about 16 Oklahoma Backroads  blocks to use up those scraps and assemble the quilt later.  I need to get back to my 'must do' projects, but a little creative break might be just what I need.

It is a 'creative break' isn't it, and not just procrastination?

Saturday, February 8, 2014

Another Quilter's Treasure

Yesterday I was out with a friend and we stopped in at a 'thrift store.'  She found a $4 bag of fabric scraps and put it in my cart. Looks like some great fabrics in there for scrap quilting.  Let's take a look...

This reminds me of the children's television shows of my childhood.   Children who were live guests on the show sat in a section of bleacher seats and at the end of the show were given a 'grab bag' of treats.  The host had a child pull out the items one at a time to see what was inside - and of course mention the sponsors of the show.  Old Dutch Potato Chips, Pearson's Salted Nut Roll, Laffy Taffy to name a few.  Those memories are even in black and white!

Well, on to our grab bag!

First there are some already cut pieces for applique, and even the templates.  Aren't those fussy-cut petals with the daisy so cute!

Five circles, Eight diamonds - four of each color, and a couple triangles.


There are lots of 2 inch squares, and some short strips 
from 1.5 inches up to 2.5 inches.  
And a few more in the 3, 4 and 5 inch range.


Then there are Quarter Yard pieces with only a small section cut out of one corner where the quilter had taken a bit for applique.

Wow!  I love those rich jewel tone colors.

 Finally, in between a couple of those 1/4 yard pieces, there is this very out-of-place and much older piece of fabric.  Red with mushrooms, looser weave.  Has to be 1960's fabric!  Back from the days of the last of those television children's shows.  It sure made me smile!

Hope you get a smile today too, and have a chance to Quilt Awhile.

Monday, February 3, 2014

Red and White Quilt Show

An on-line quilt show of Red and White quilts is being hosted this week by Sew Cal Gal.  Since I do have one red and white quilt I might as well join in the fun! You should too if you have made a red and white quilt. Stop by Sew Cal Gal and add your link, or at least take a look at some of the lovely quilts that are linked to her Quilt Show.

A special welcome if you've been there already and have come to take a peek at my link.
I'm so glad you're here!
Twinkle Twinkle Little Star 2009

Deep in my stash were two burgundy reds with white prints, and two whites with burgundy prints that I had been saving to use together sometime.  My neighbor was cleaning out some back issues of magazines and gave me a few.  When I saw this quilt in the April 2004 Quilter's World Magazine I knew I had finally found the right pattern to use them!

I began piecing the quilt in January 2008 and then stalled out after the top center was completed.  There was not enough fabric for borders, and by that time the colors had gone out of fashion.  I couldn't find that shade of dark red anywhere!

I found some gingham that was the right shade, and used it for the border.  I hated it!  I ripped off the gingham border. 'Twinkle' sat in the UFO pile.  I was so disappointed, because I loved the center, but whatever I auditioned for the border was just not right.

Finally, after over a year of searching, I found a dark red remnant that was nearly the right shade of red with a light grey print.  I figured that it was the best I was going to find.  I finished up the quilt in October 2009.  It is twin size, 67x78.

The quilting is done with dark red thread-- stitch in the ditch except for the large white areas where I stitched the star pattern that is pieced into the quilt. The border is quilted with five-pointed stars.  It was a motif I found in a library book and could make with three passes around using my walking foot.

Thanks again for stopping by.  Since you have made it this far, you might as well leave a note. Not only would I love to hear from you, but it's fun for others to read the comments and find out who else has come to visit!

Saturday, February 1, 2014

2 Hearts: mini ornament

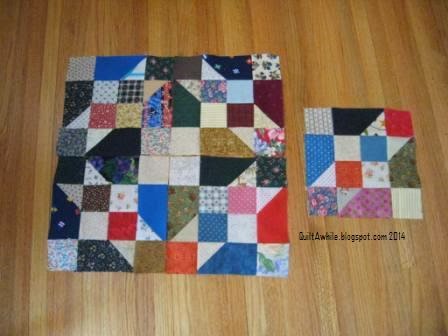
February could be called the month of Love because we celebrate St. Valentine's Day on the 14th of this month.  And we all Love quilting, so here's a tutorial for a lovely little mini ornament and there's plenty of time to whip up a few for someone you love this month.  They finish at a sweet 3 inches!  Perfect for adding to a Valentine card or as a little decoration around the house.


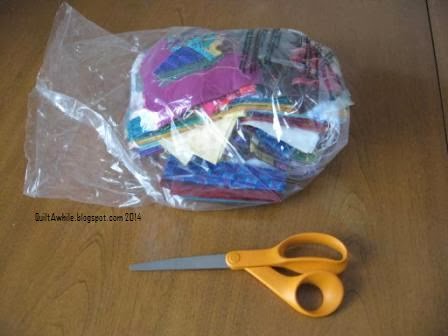
You will only need a few tiny bits of fabric from your string scraps.
Two 1-inch white squares
Two 1-inch red squares
Two 1-inch x 1.5 inch red rectangles
Two 1.5 inch white squares
Two 1-inch x 2.5 inch white rectangles for border
Two 1-inch x 3.5 inch white rectangles for border
One 3.5 inch square of muslin for the back
One 3.5 inch square of batting
Optional: 6 inch piece of 1/4 inch wide ribbon and a button or charm

Step one: Join the 1-inch red and white squares.  Use standard 1/4 inch seams.


Step two:  Add the red 1-inch x 1.5 inch rectangles to one side.  Doesn't have to be the same side.  I thought alternating actually gave a little more movement and balance to the block.

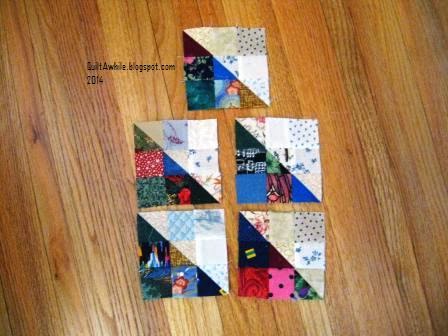
Step three:  Add the 1.5 inch white squares and make a 4-patch block. Square up if  needed.  Sometimes those little pieces twist a bit on me.
Step four:  Layer backing and batting.  Lay out your 4-patch in the center.  Flip over at the seam line and stitch over your seam through all layers.

Step five:  Open up your 4-patch and add borders, stitching through all layers as you add each one. Add alternating sides first, then top and bottom.


Step six:  Top stitch around the edges - through all layers - about 1/2 inch from your 4-patch, using the edges of the 4-patch as your guide lines.  I changed my foot and moved the needle all the way to the right so I could use the edge of the foot as a guide.

Step seven:  Trim edges close to your top stitching line.  Use a pinking shears or cut a straight edge.  Additional options are to blanket stitch or zig-zag stitch around a straight cut edge.

Step eight:  Add a hanging ribbon if you wish, and any additional embellishment.  I found a pack of heart shaped charms at Michael's Craft store in the wedding section and added one of those.  As you can see from the photo, I tried a pink print for borders and it looks great, but red would make the lower heart disappear - so make sure you have enough contrast.

Added bonus:  Makes a great Christmas tree ornament too!

Legal stuff:  This is a simple traditional pattern and only my photos and the wording of these directions would fall under copyright, so just don't copy those and pretend they're yours, OK? Otherwise, no restrictions that I am aware of on the use or sale of ornaments you make using this tutorial. They might be nice for a Church bazaar or craft fair.  Have fun!